
How to Make a Shadow Box with Cricut
Red-winged blackbirds are the first sign of spring and their wing coloring makes them easy to spot. This shadow box is an inspired take on them. Shortly after making this shadow box, I saw one as we were driving and it was fun to recognize it. Each year I learn more about the birds here in Michigan and the mid-west.
This shadow box has 11 layers which create a scene based on where you can find red-winged blackbirds. Each layer has foam dot adhesives between them to provide depth. These steps for assembling a shadow box can apply to any design. With some paper, glue, and a frame, you can create a piece of art for your home.
Materials
SVG from HintofMitten Etsy
Green Mat
16 - 65 lb or 80 lb Sheets of Cardstock (12” x 12” sheets for main layers and any size sheets for bird colors)
Brayer Tool
Weeding Tool
Foam Dot Adhesives from Amazon
Glue Pen such as Zig 2-Way Glue Squeeze and Roll Pen
12” x 12” Shadow Box from Michaels
Upload Files to Design Space
Purchase SVG from HintOfMitten Etsy shop. Download and save the Etsy files onto your computer. Open up your cutting program of choice such as Cricut Design Space.

Create a new project and upload the SVG file into Design Space. Select your uploaded image and then click “Add to Canvas” in the bottom right. You can select multiple uploaded files and add to canvas at the same time.
Prepare Design for Cutting

You will now see the bird design on your canvas. Size the image based on your final product. I did 11.5” wide for my 12” x 12” shadow box. There is a wood insert inside of the shadow box, so 11.5” is what fits and also the biggest size to cut on 12” x 12” mat.
You will see 27 different layers on the right-hand side. Each one can have its own color, but I suggest coordinating some layers to minimize cuts and create a cohesive design. Choose a color by “Basic Cut”.
Click the “Make It” green button to cut the paper.
Cut the Paper with Cutting Machine

Select how you would like to cut your material. For this project, I selected mat since I was not using any smart materials. Click “Confirm”.

All color layers will show up on the left-hand side. Double check the paper on the mat matches the location of the design shown on the computer screen. Click the “Continue” green button in the bottom right corner.

The next step is to select the material. I did both 65 lb and 80 lb paper during testing. The 80 lb is definitely studier, but either one will work. If using 65 lb paper, cut the paper on the 80 lb paper setting unless you have a brand new blade. For 80 lb paper, use 100 lb paper cutting setting. This helps cut the paper all the way through. Select the default pressure setting.
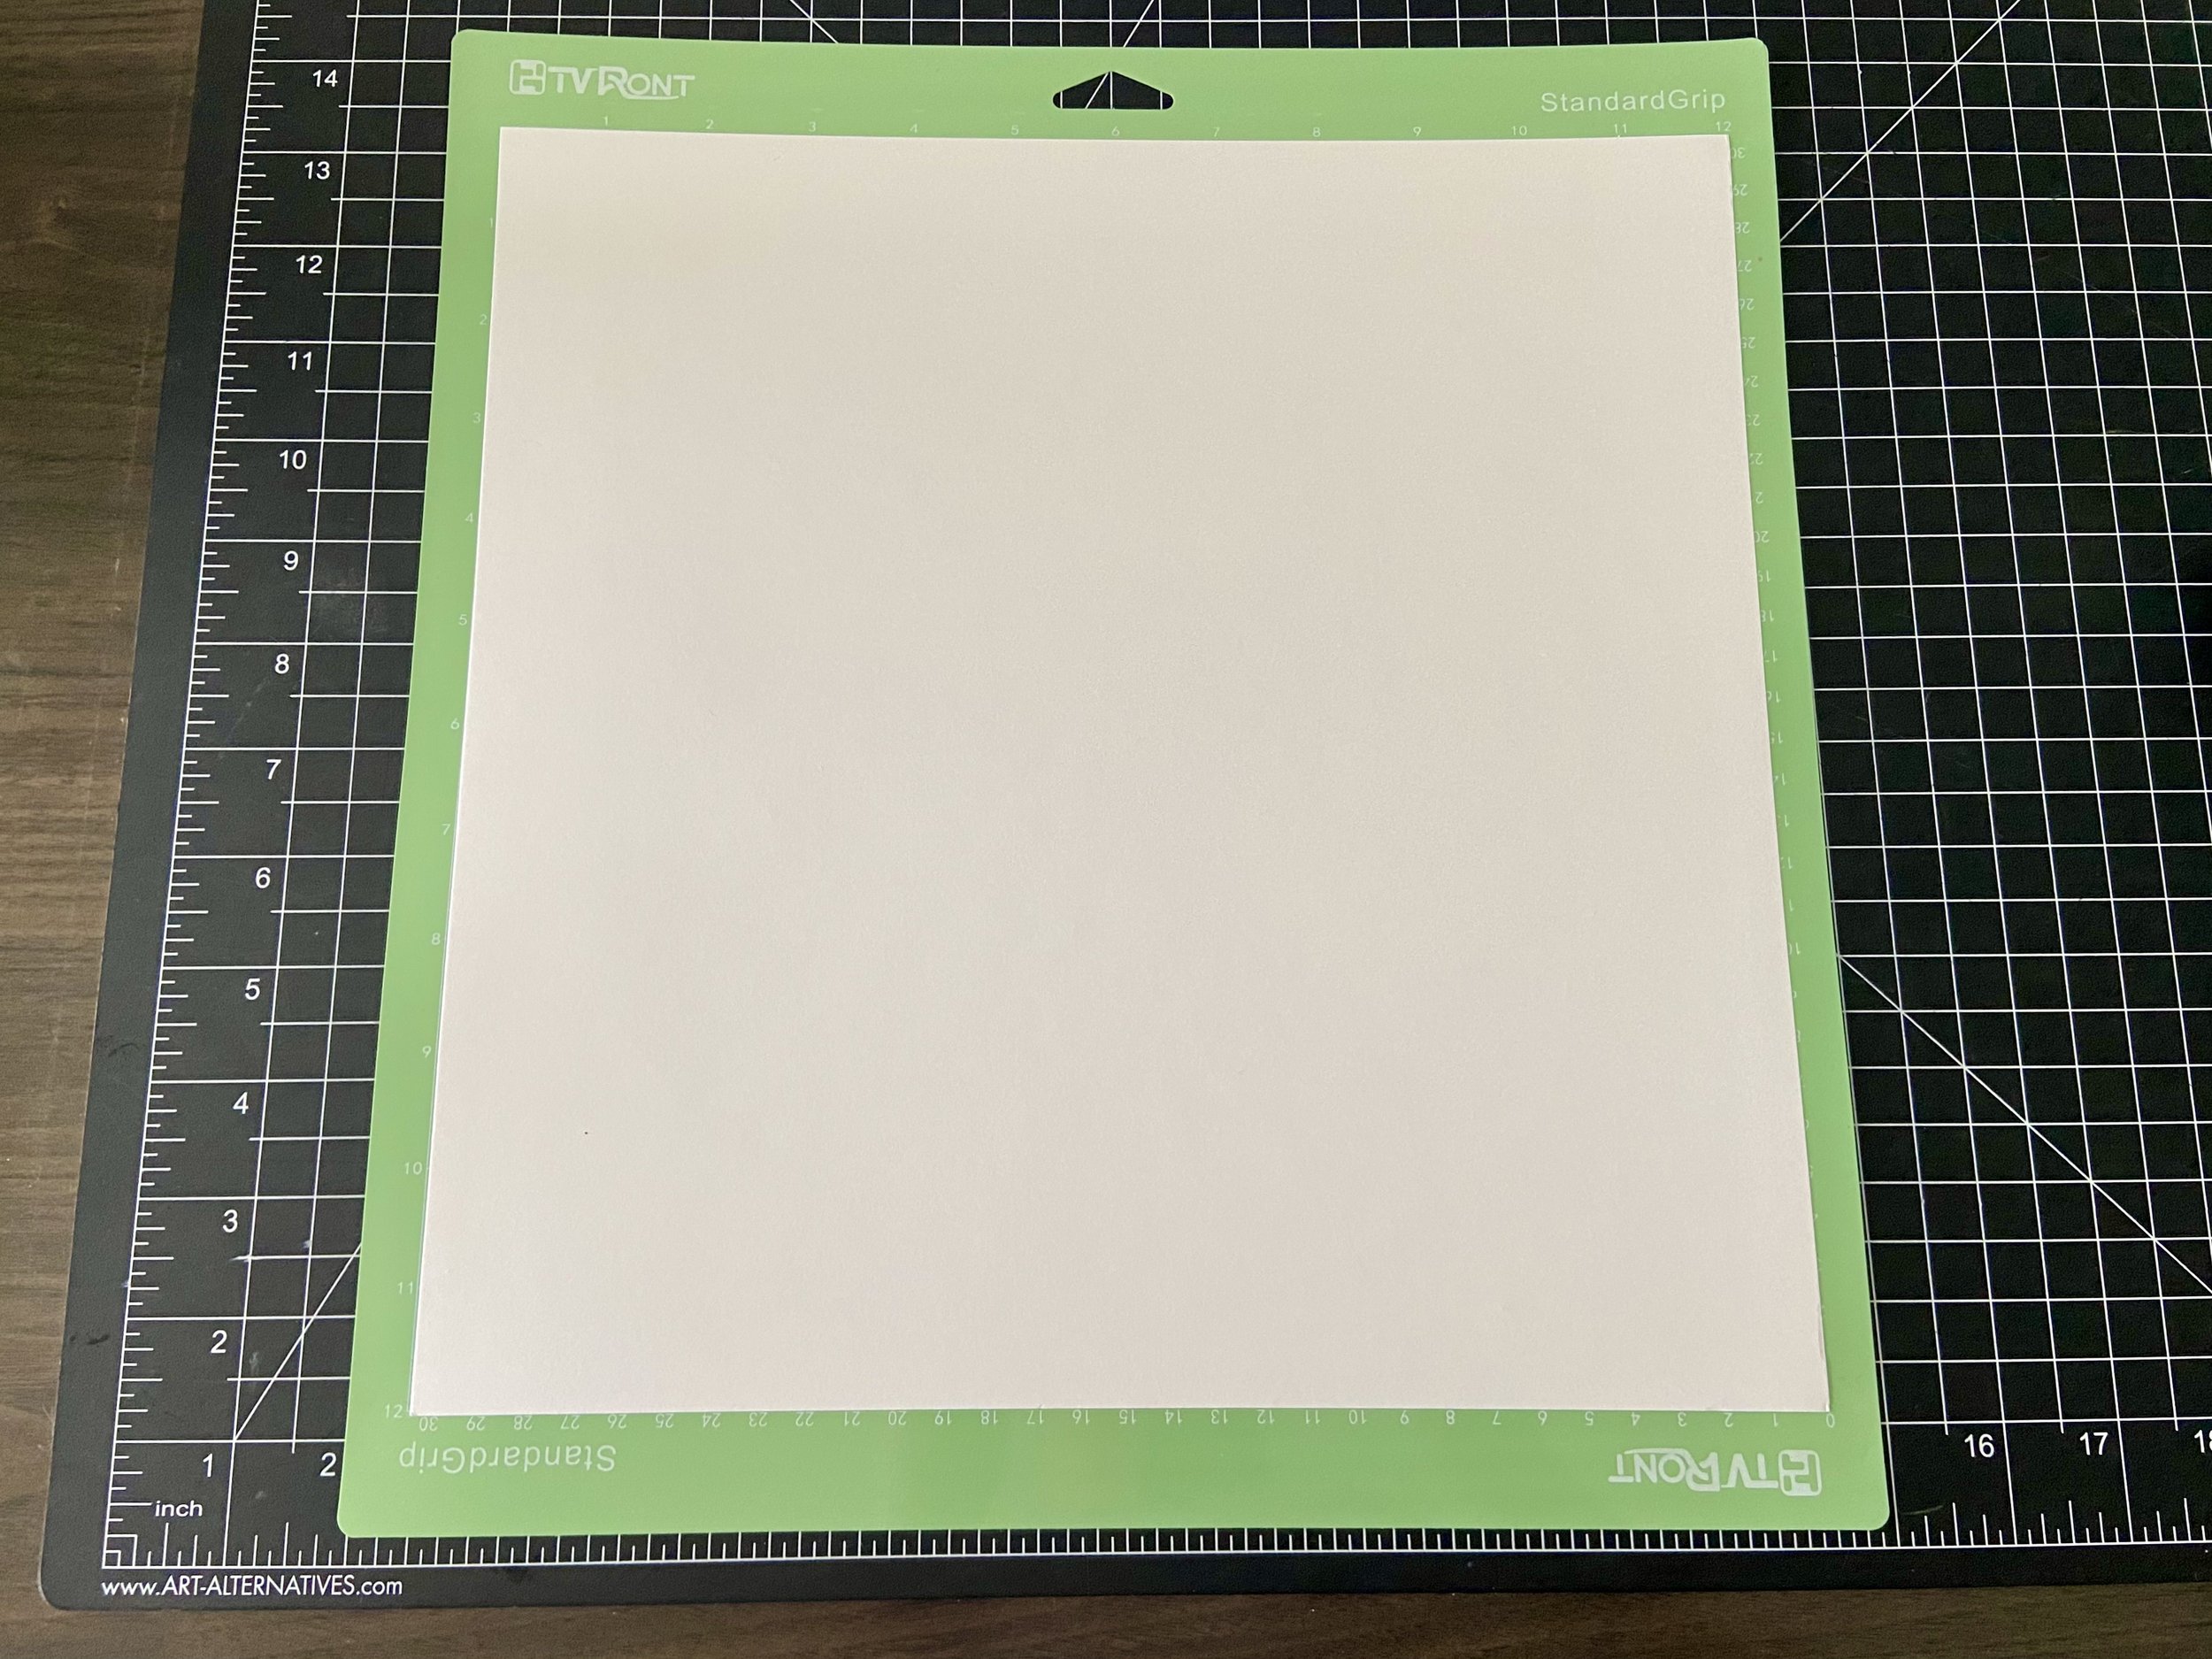
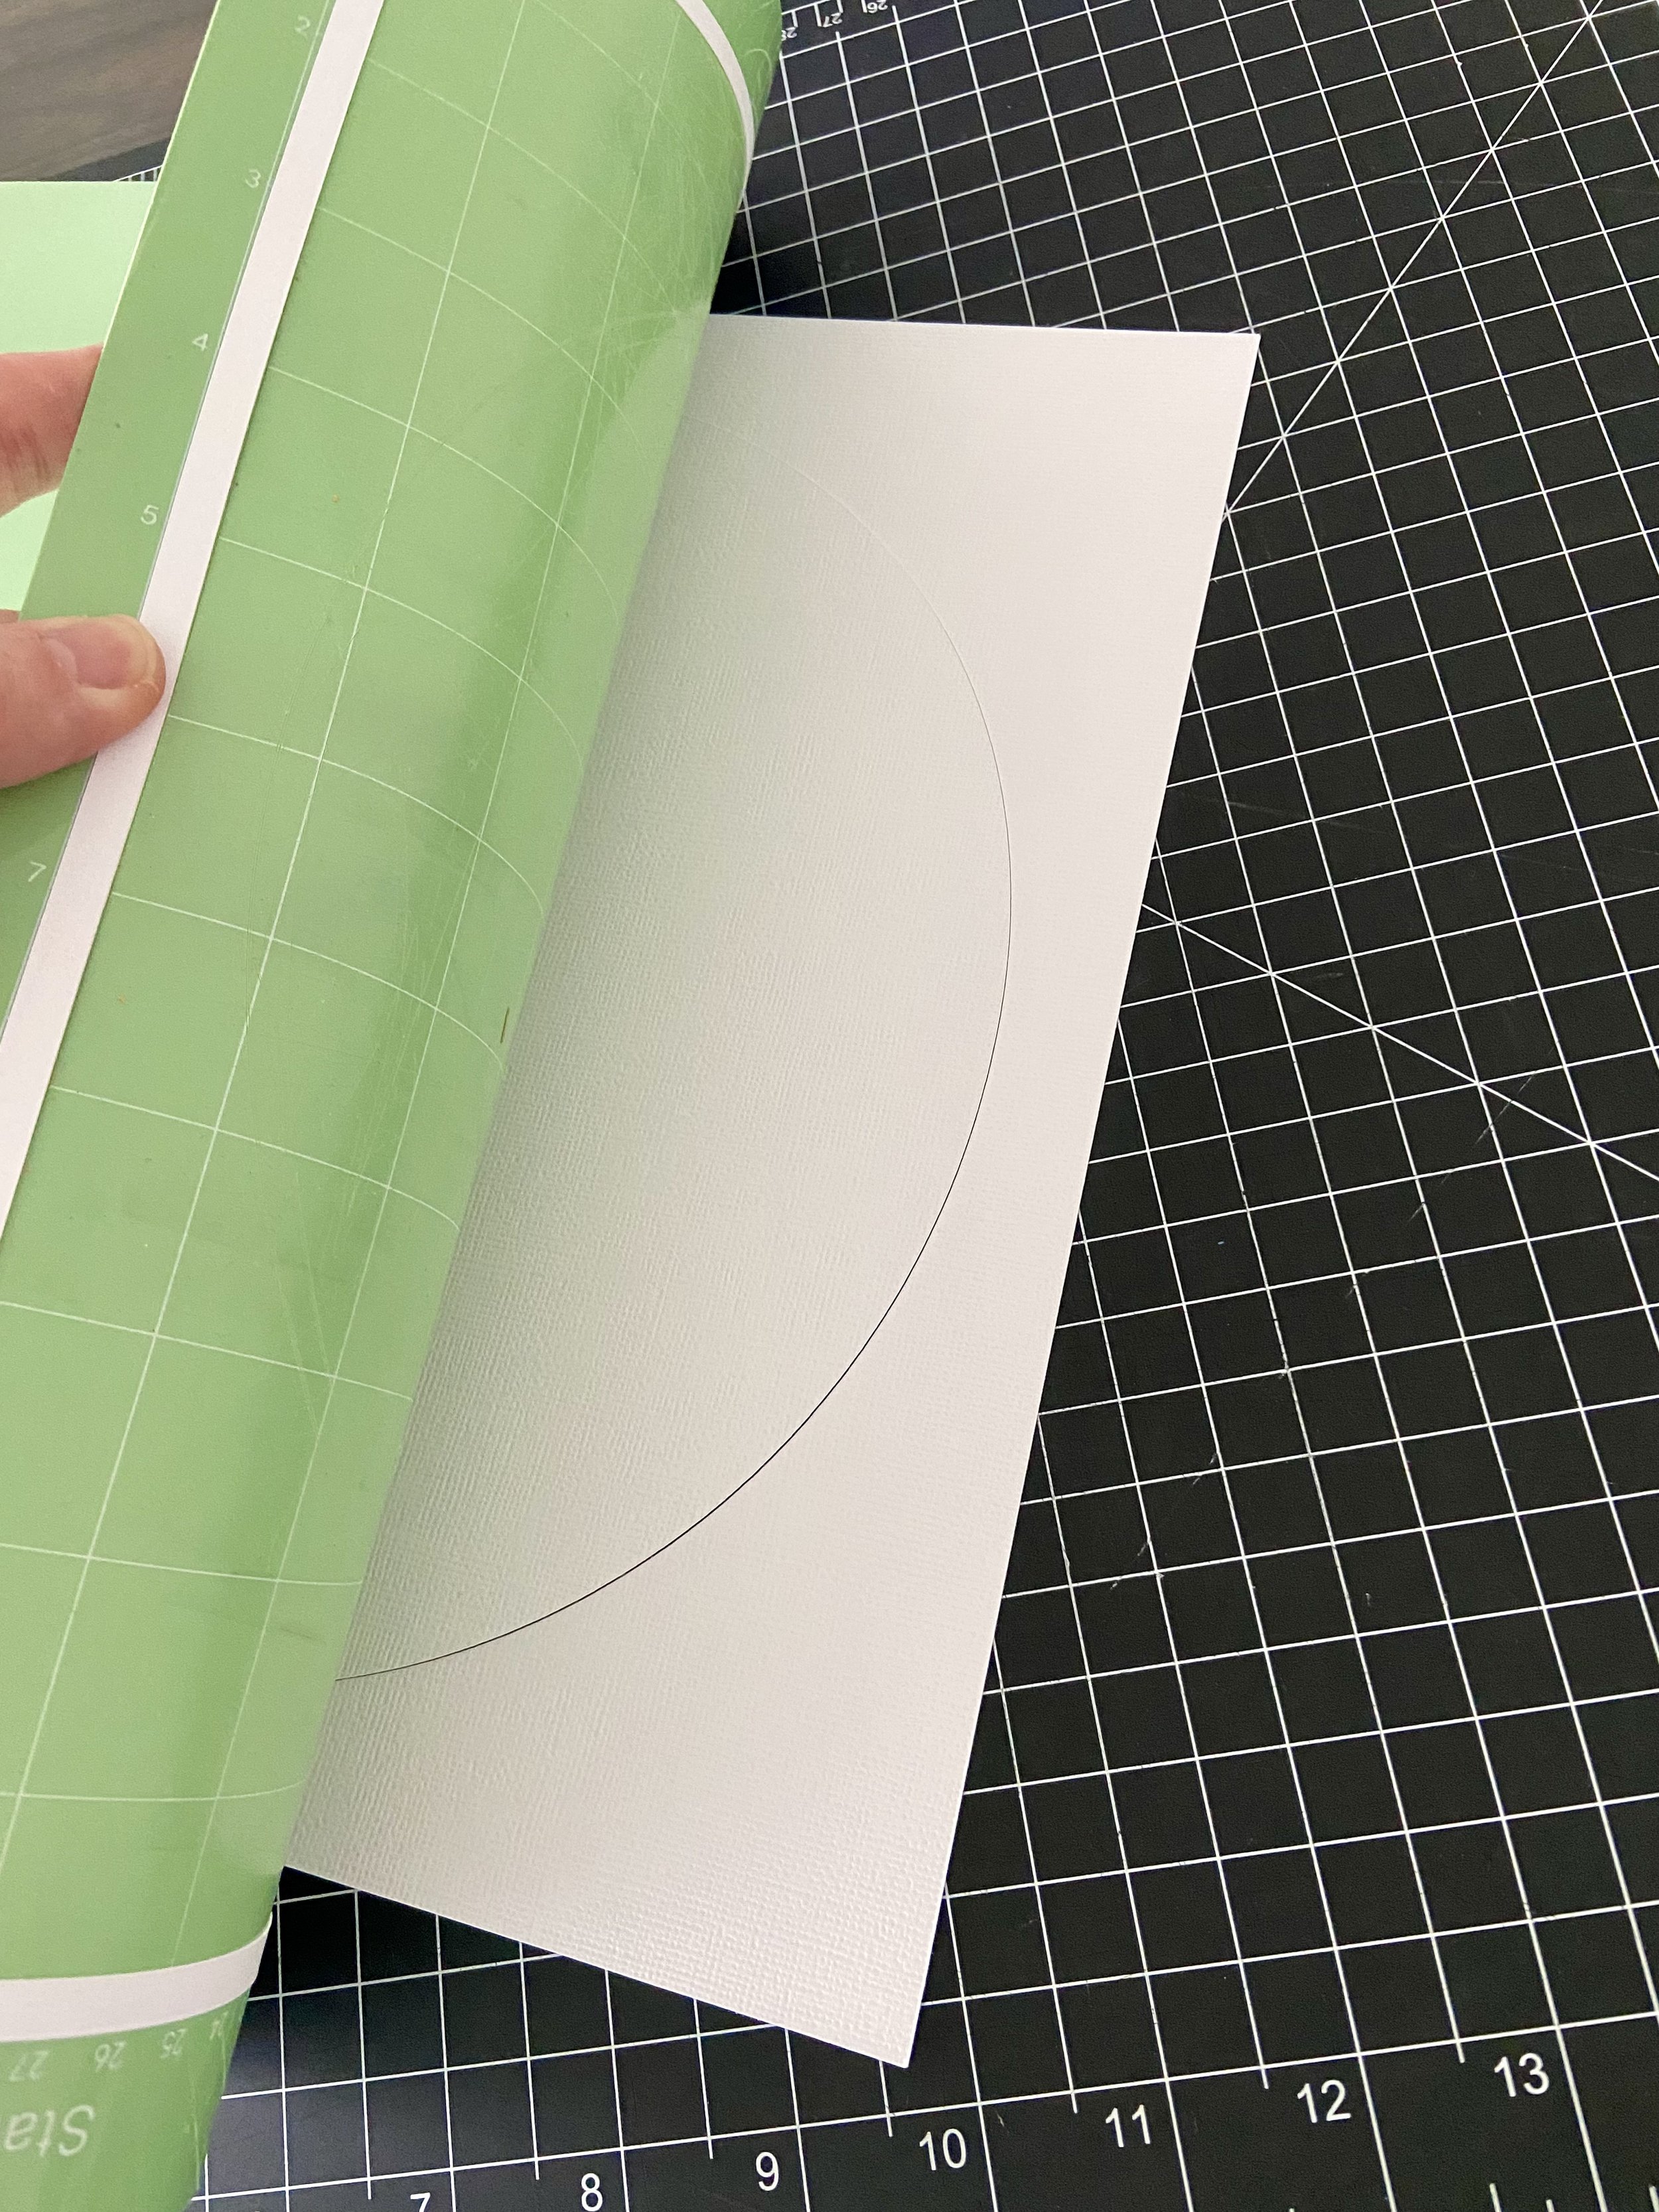
Place the paper onto the green mat and use the brayer tool to smooth it down. Insert the mat into the machine. Push the blinking insert button. The machine will now cut the design. When the design is done cutting, push the blinking eject button. To remove the paper from the mat, bend the mat away from the paper.
Repeat this step for all the colors. It takes time to cut all the layers. Use the weeding tool (if needed) to remove any extra pieces from the design. Use a scraper tool or lint roller to remove remaining paper on the mat.
Assembly of Shadow Box

There are a total of 11 layers and they all have numbers, except for the first and last. The numbers make it easier when assembling. The remaining pieces are used to assemble the birds.
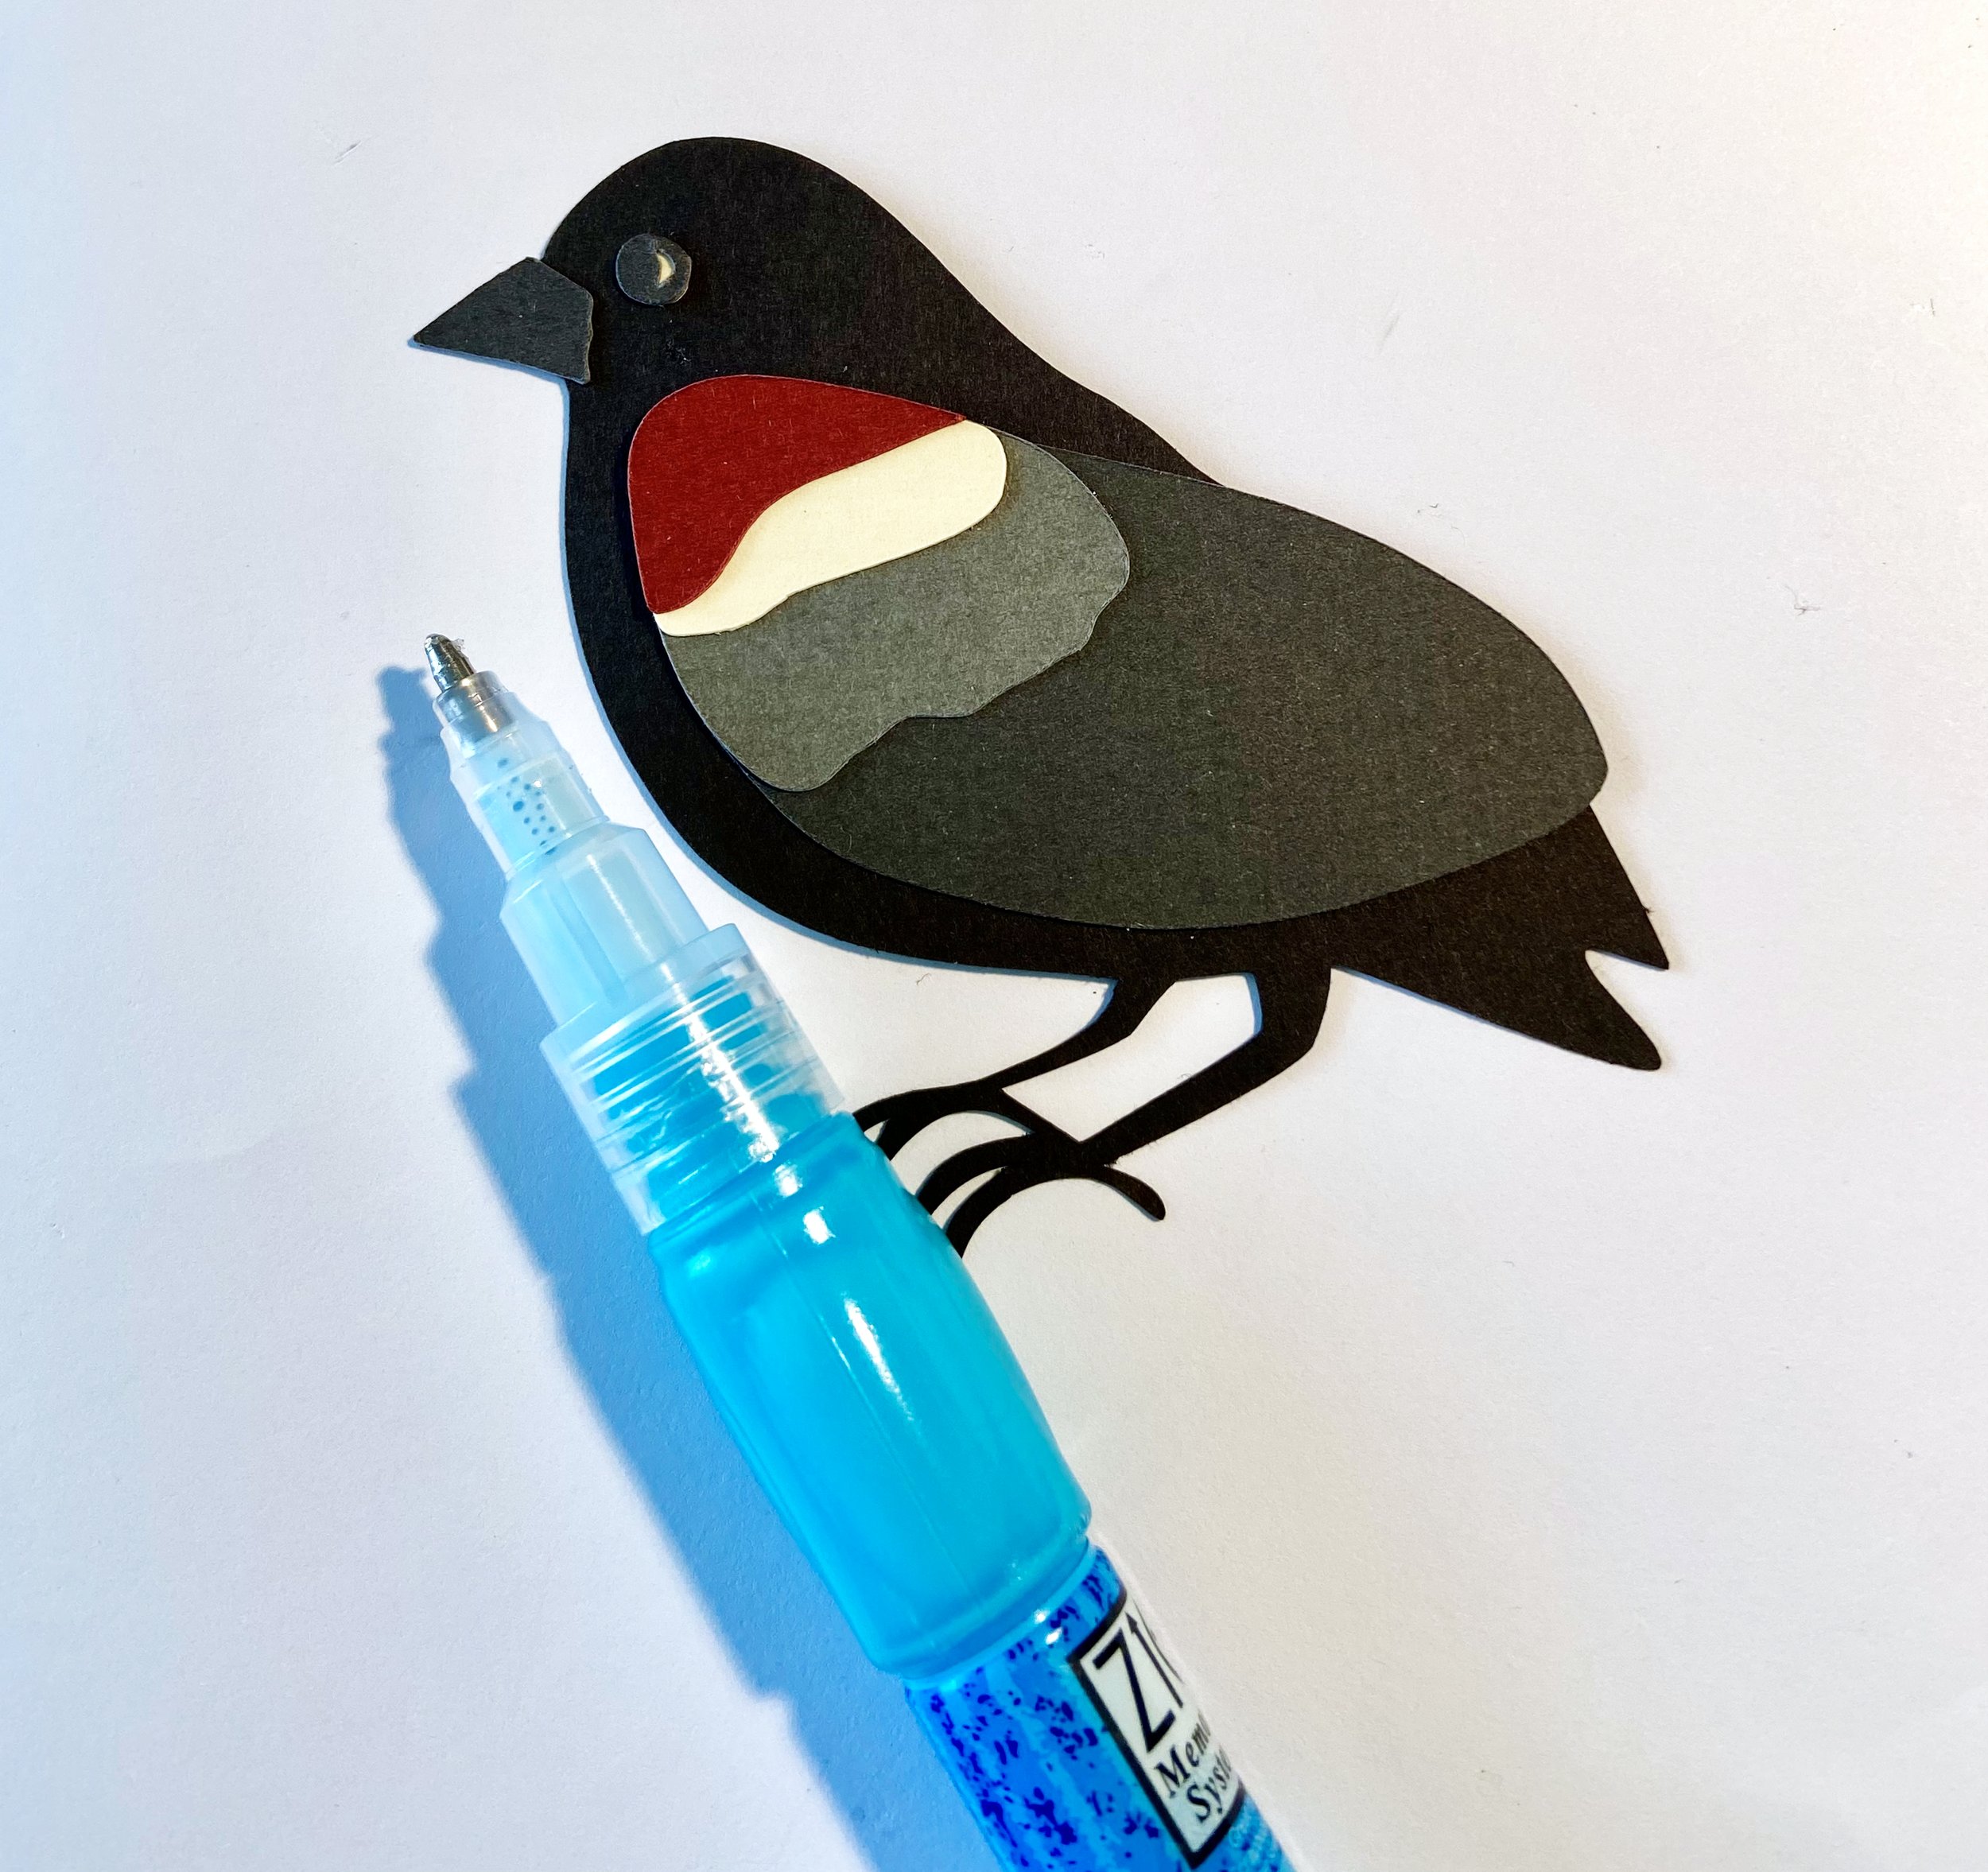
For the birds, the black bird base is slightly inset compared to the beak and wings. Glue the gray beak layer on top of the black bird. Glue the two eye layers together and then to the black bird.
For the wings, start with gluing the light gray layer on top of the dark gray layer. Then add the cream and red layers. Once the wing has been assembled, glue to the black bird. Using a glue pen or glue with a fine tip helps glue together all the tiny details. Place these two birds to the side.
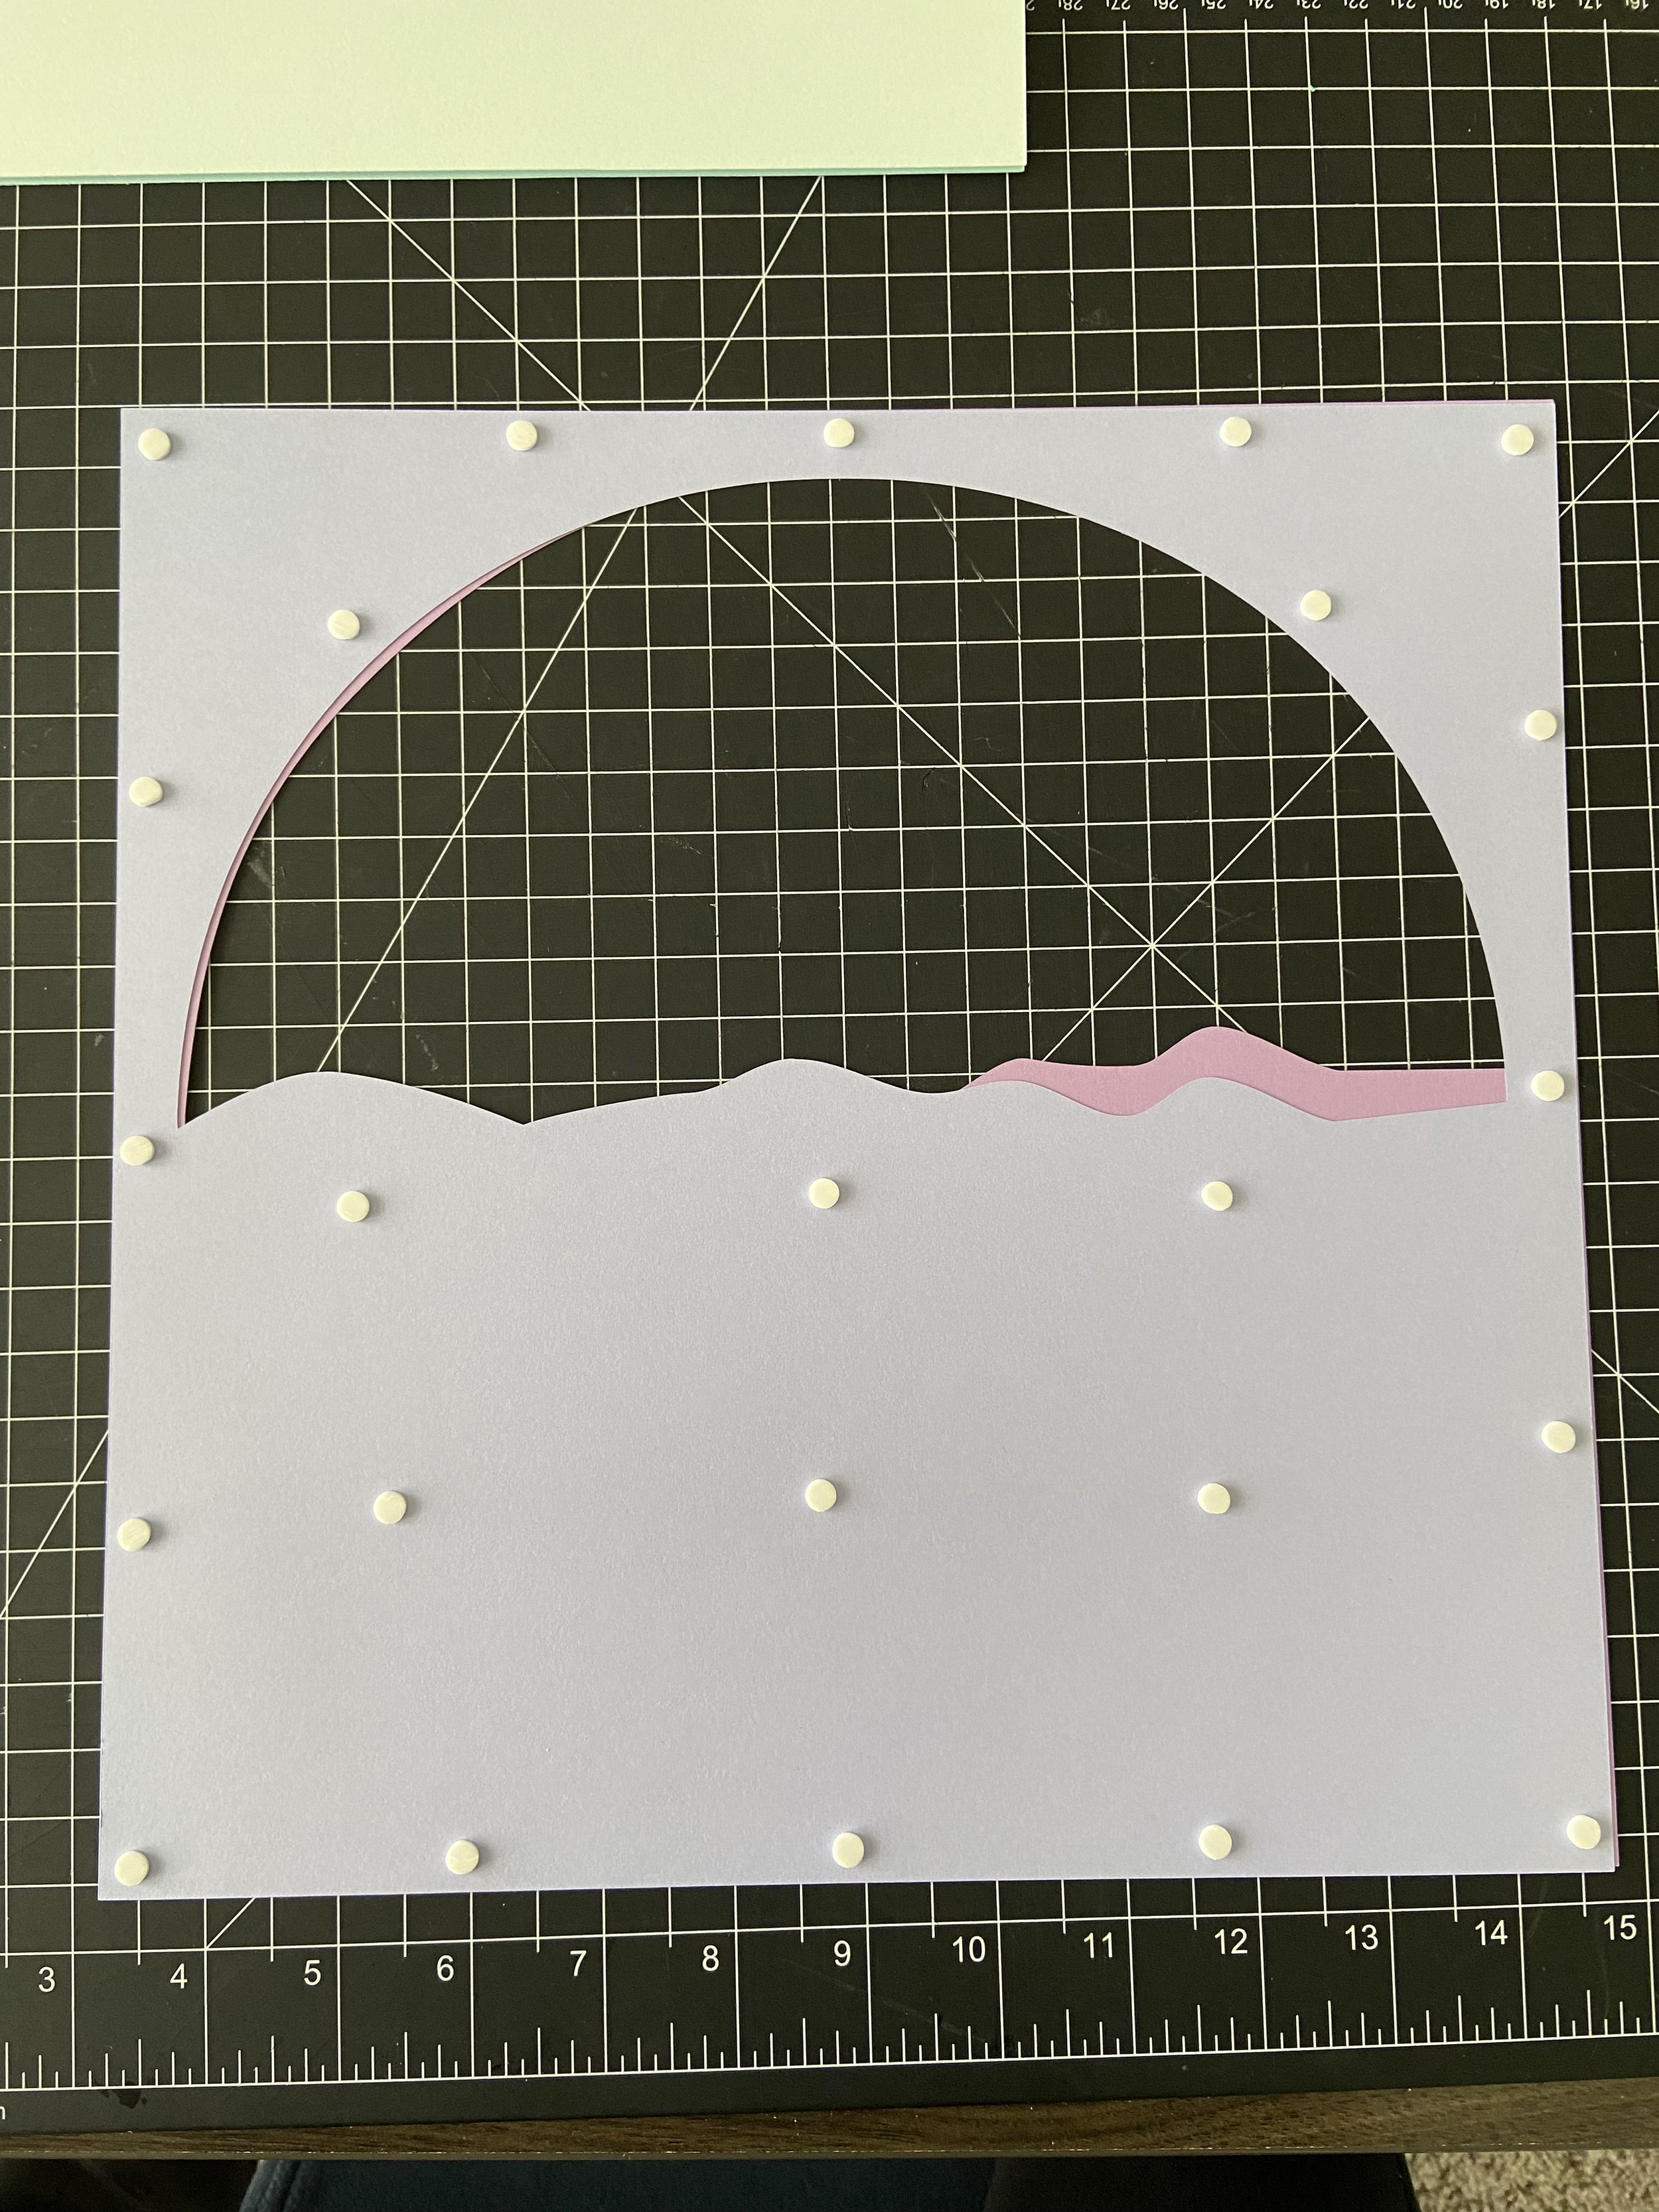
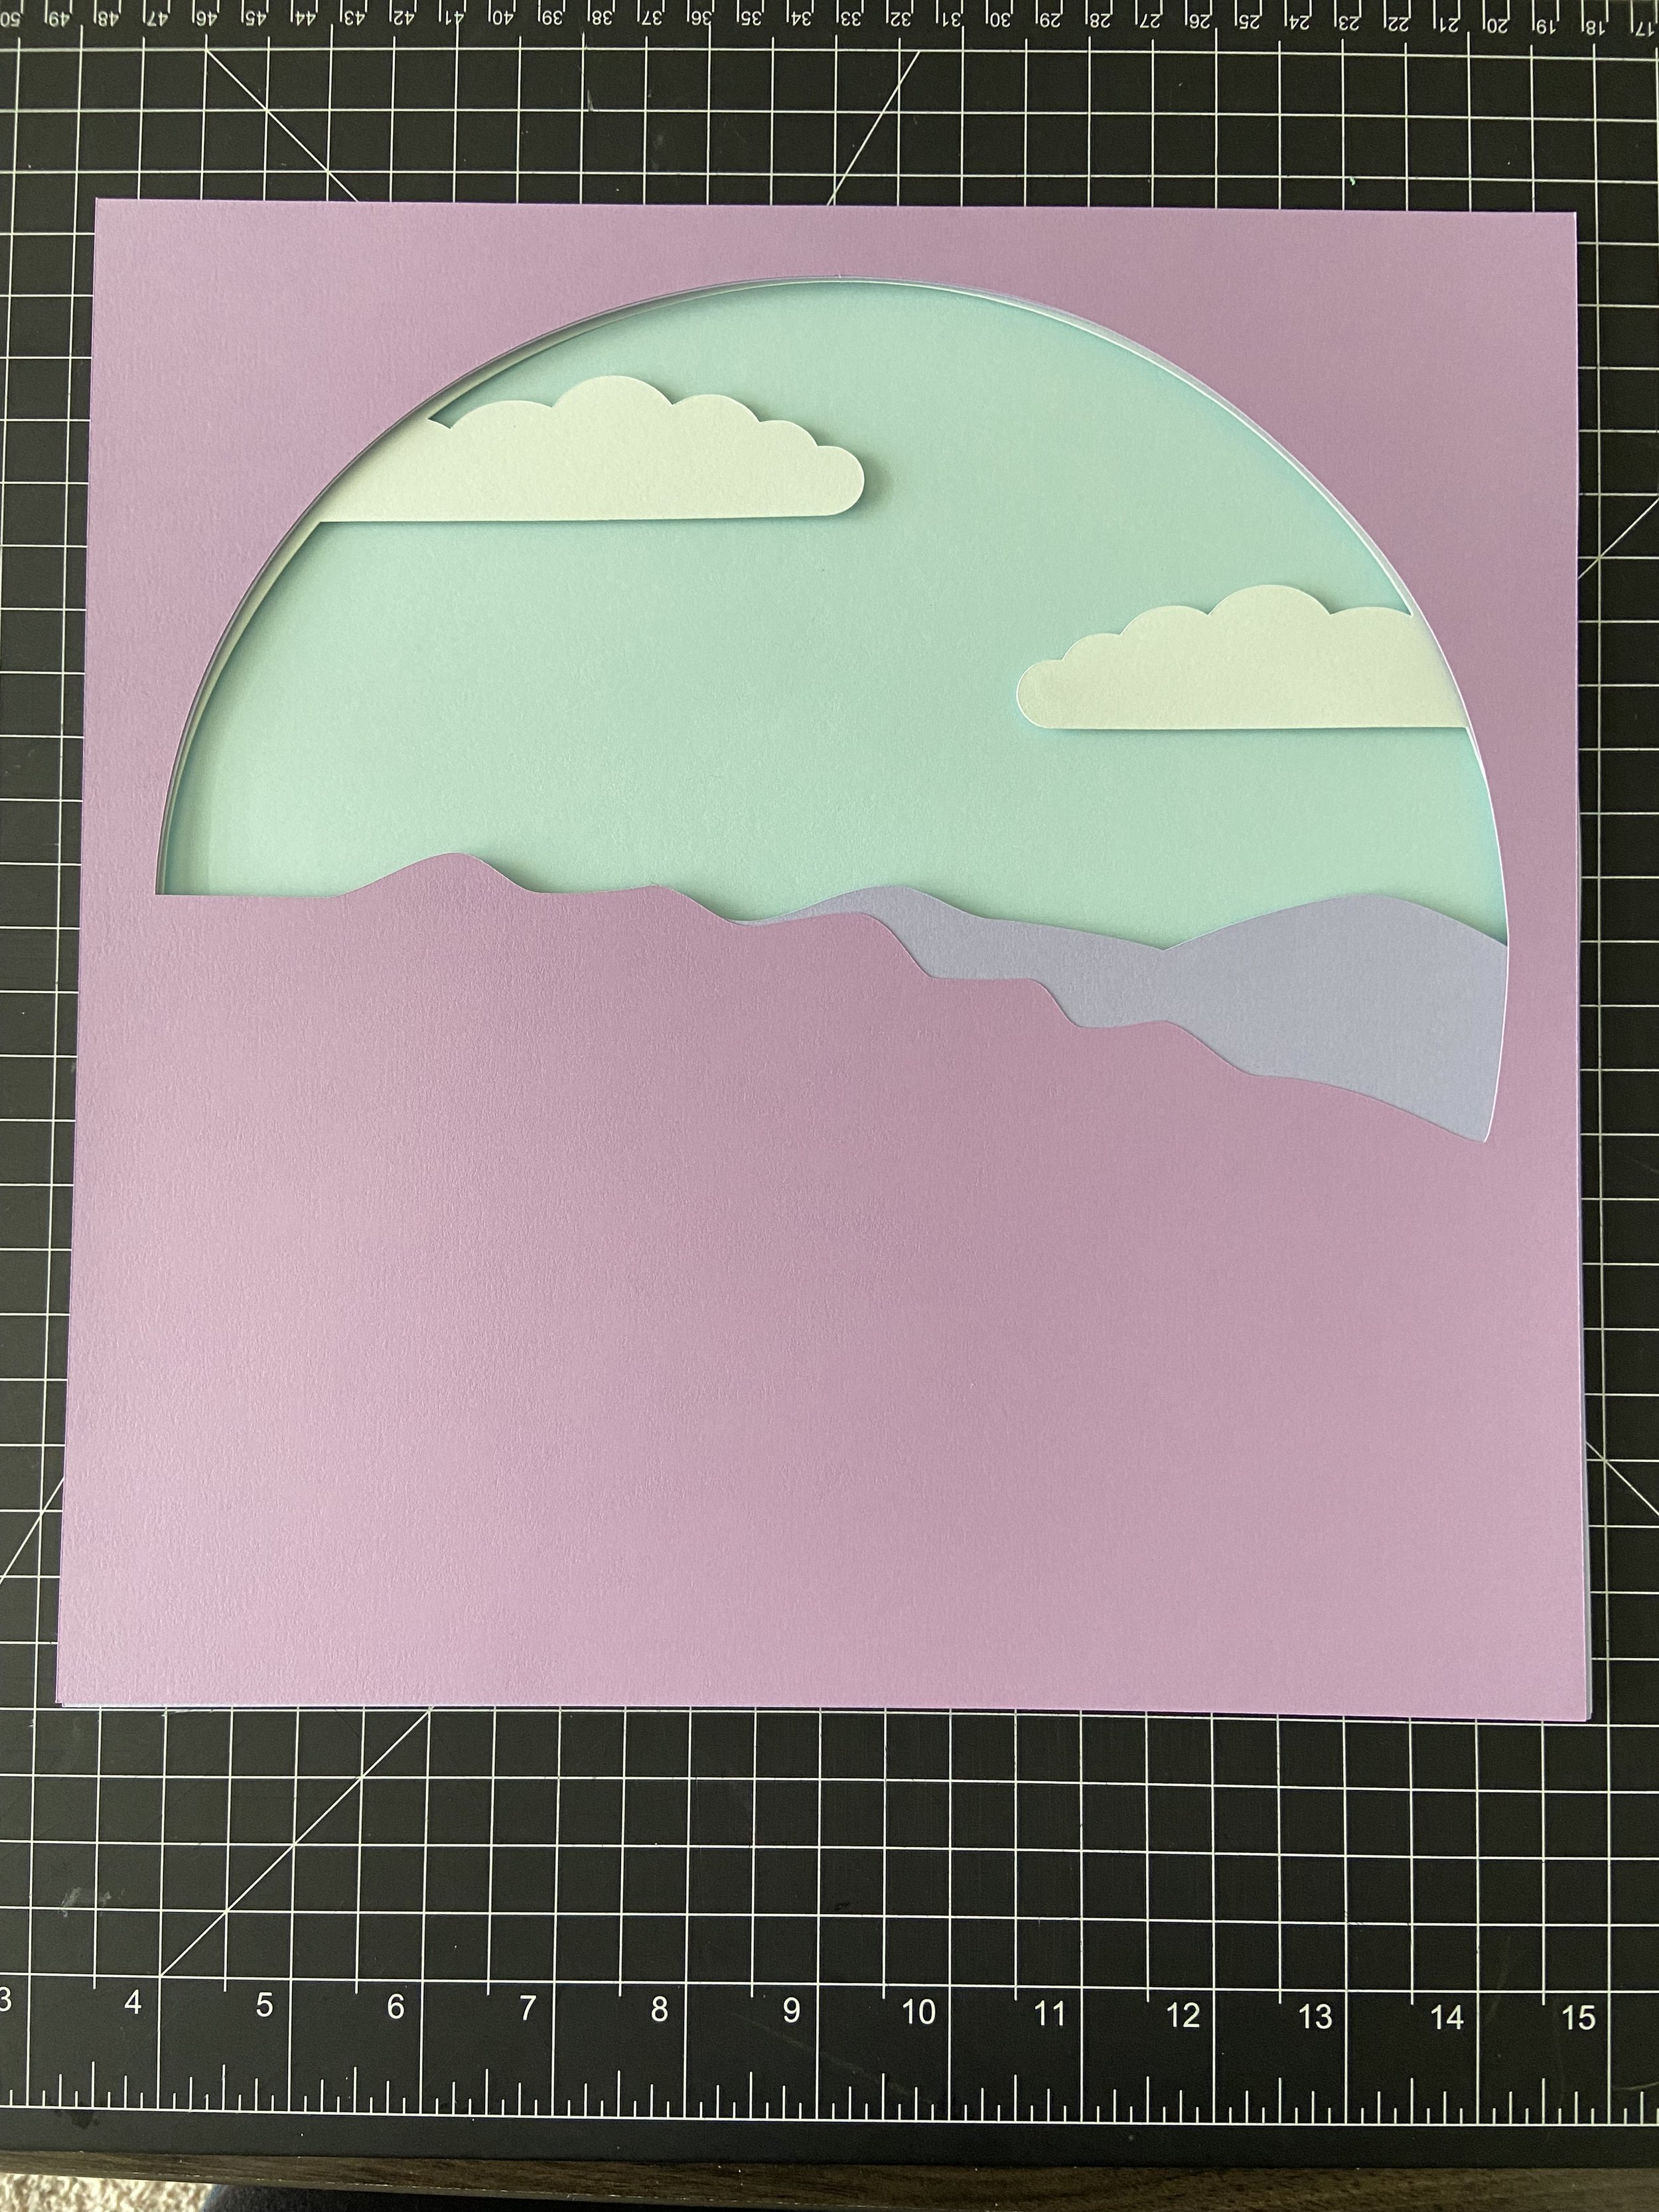
After assembling the birds, start with Layer #1. This is a square with no cutouts and it is the base for all other layers. Before adhering Layer #2, place it on top of the first layer to see all areas of overlap. Foam adhesive pieces will connect the two layers where the two layers overlap. Each layer needs to connect directly to the layer behind it for stability. Just remember, only the layer behind it and not more than that. On the backside of Layer #2, space out the dual adhesive foam every one to two inches on the clouds and circle perimeter. Flip Layer #2 back over and adhere to the bottom layer. As you go along, the circle design helps line up each layer. For this one, just line up the edges. Once the foam dots touch the paper, it is very tricky to move. Best to be as accurate as possible the first time.
Layers #3 and #4 are next. I glued these two together, but you can also make them two separate layers with foam dots in between. Place foam dots around the circle along with the bottom half of the design - not the clouds.
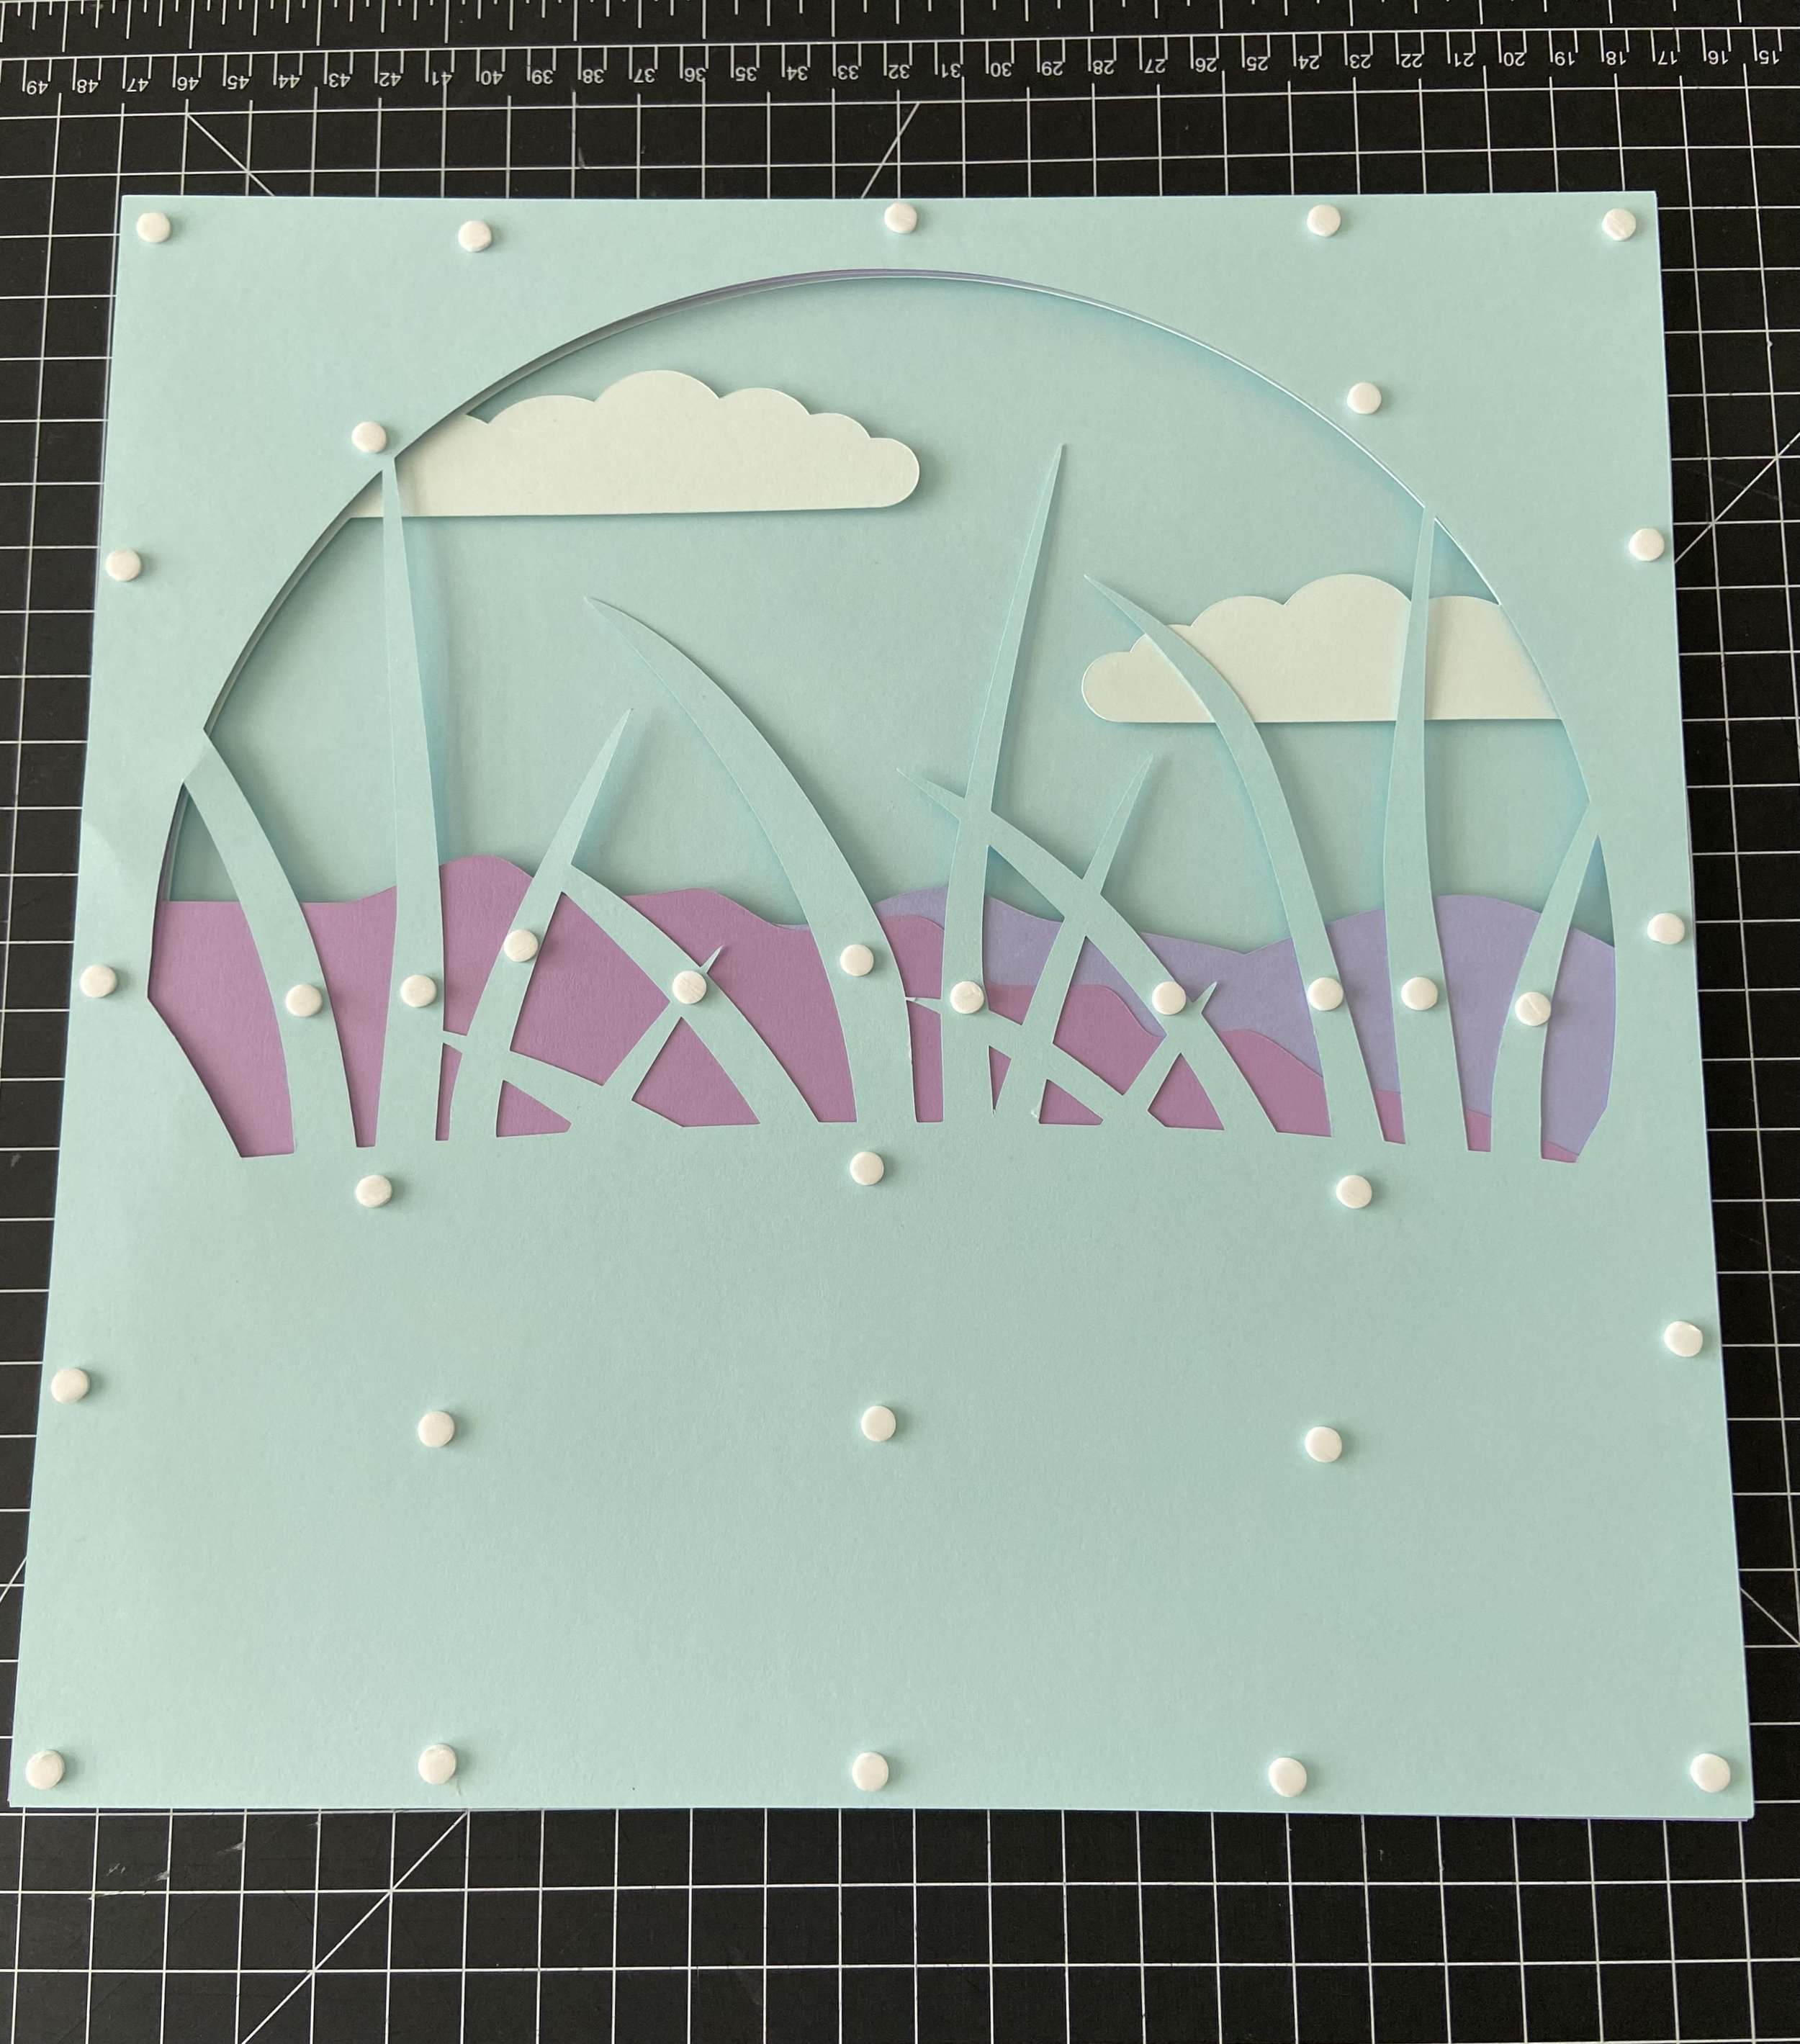
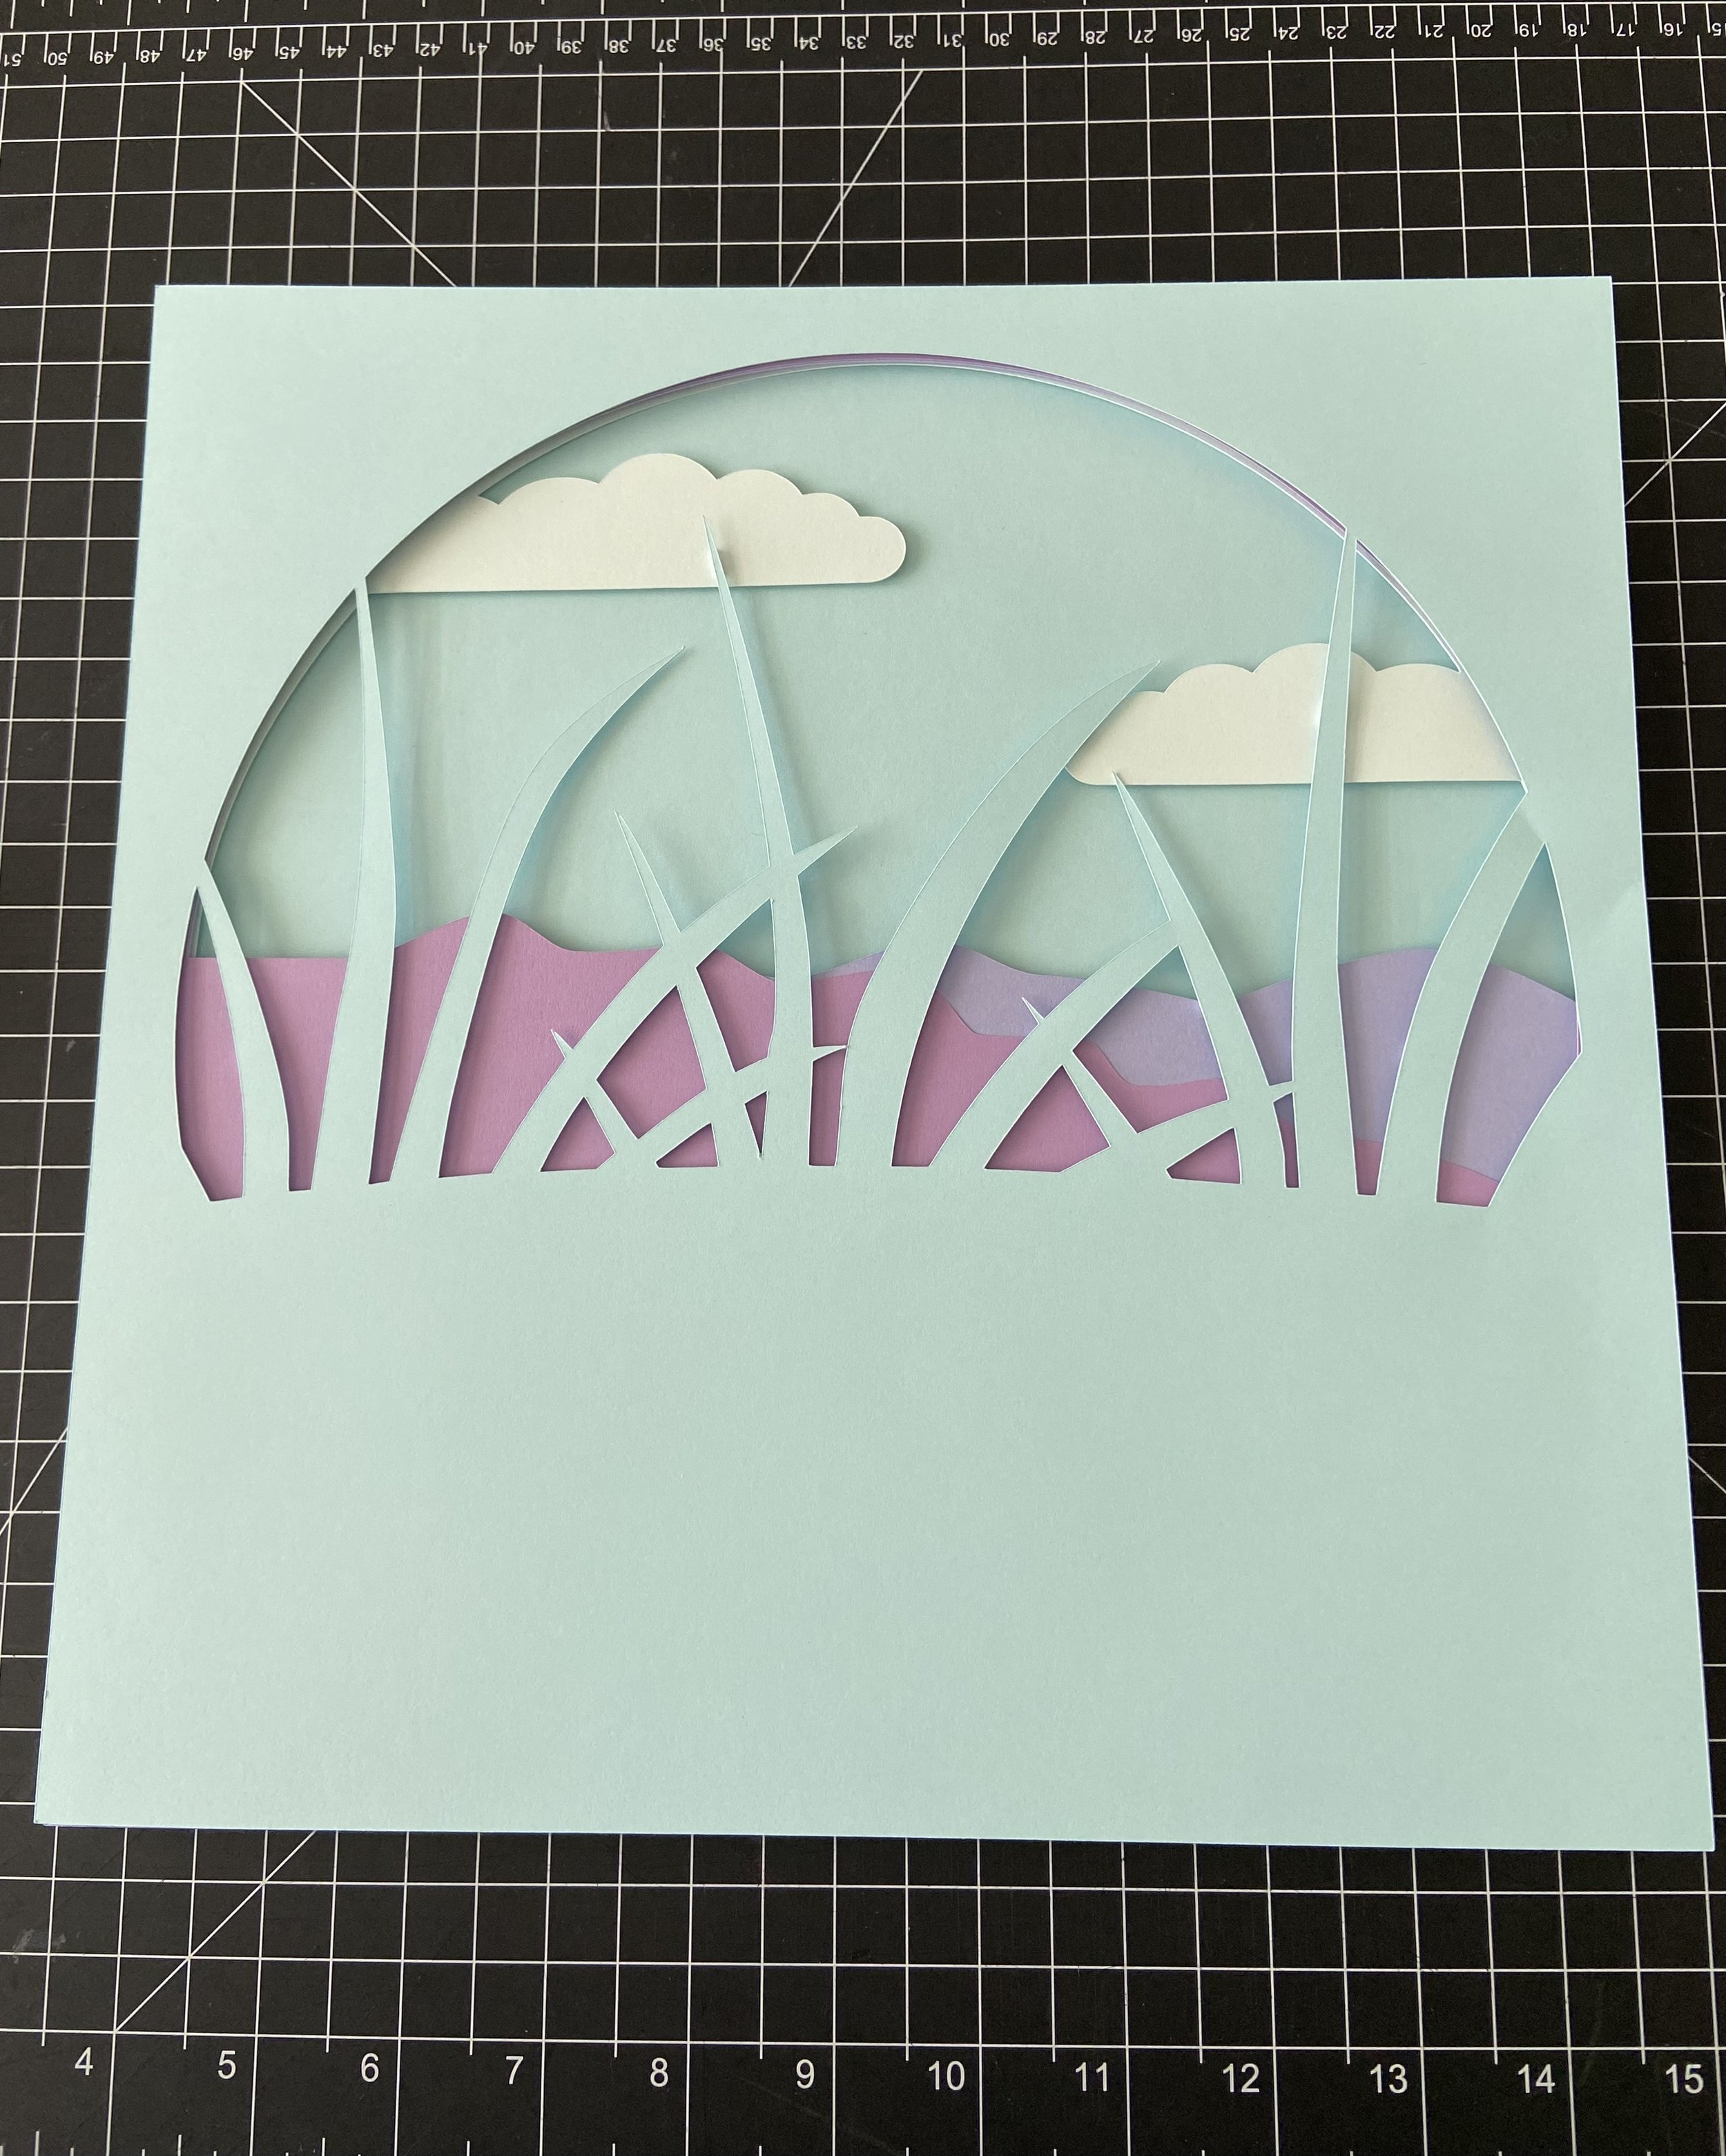
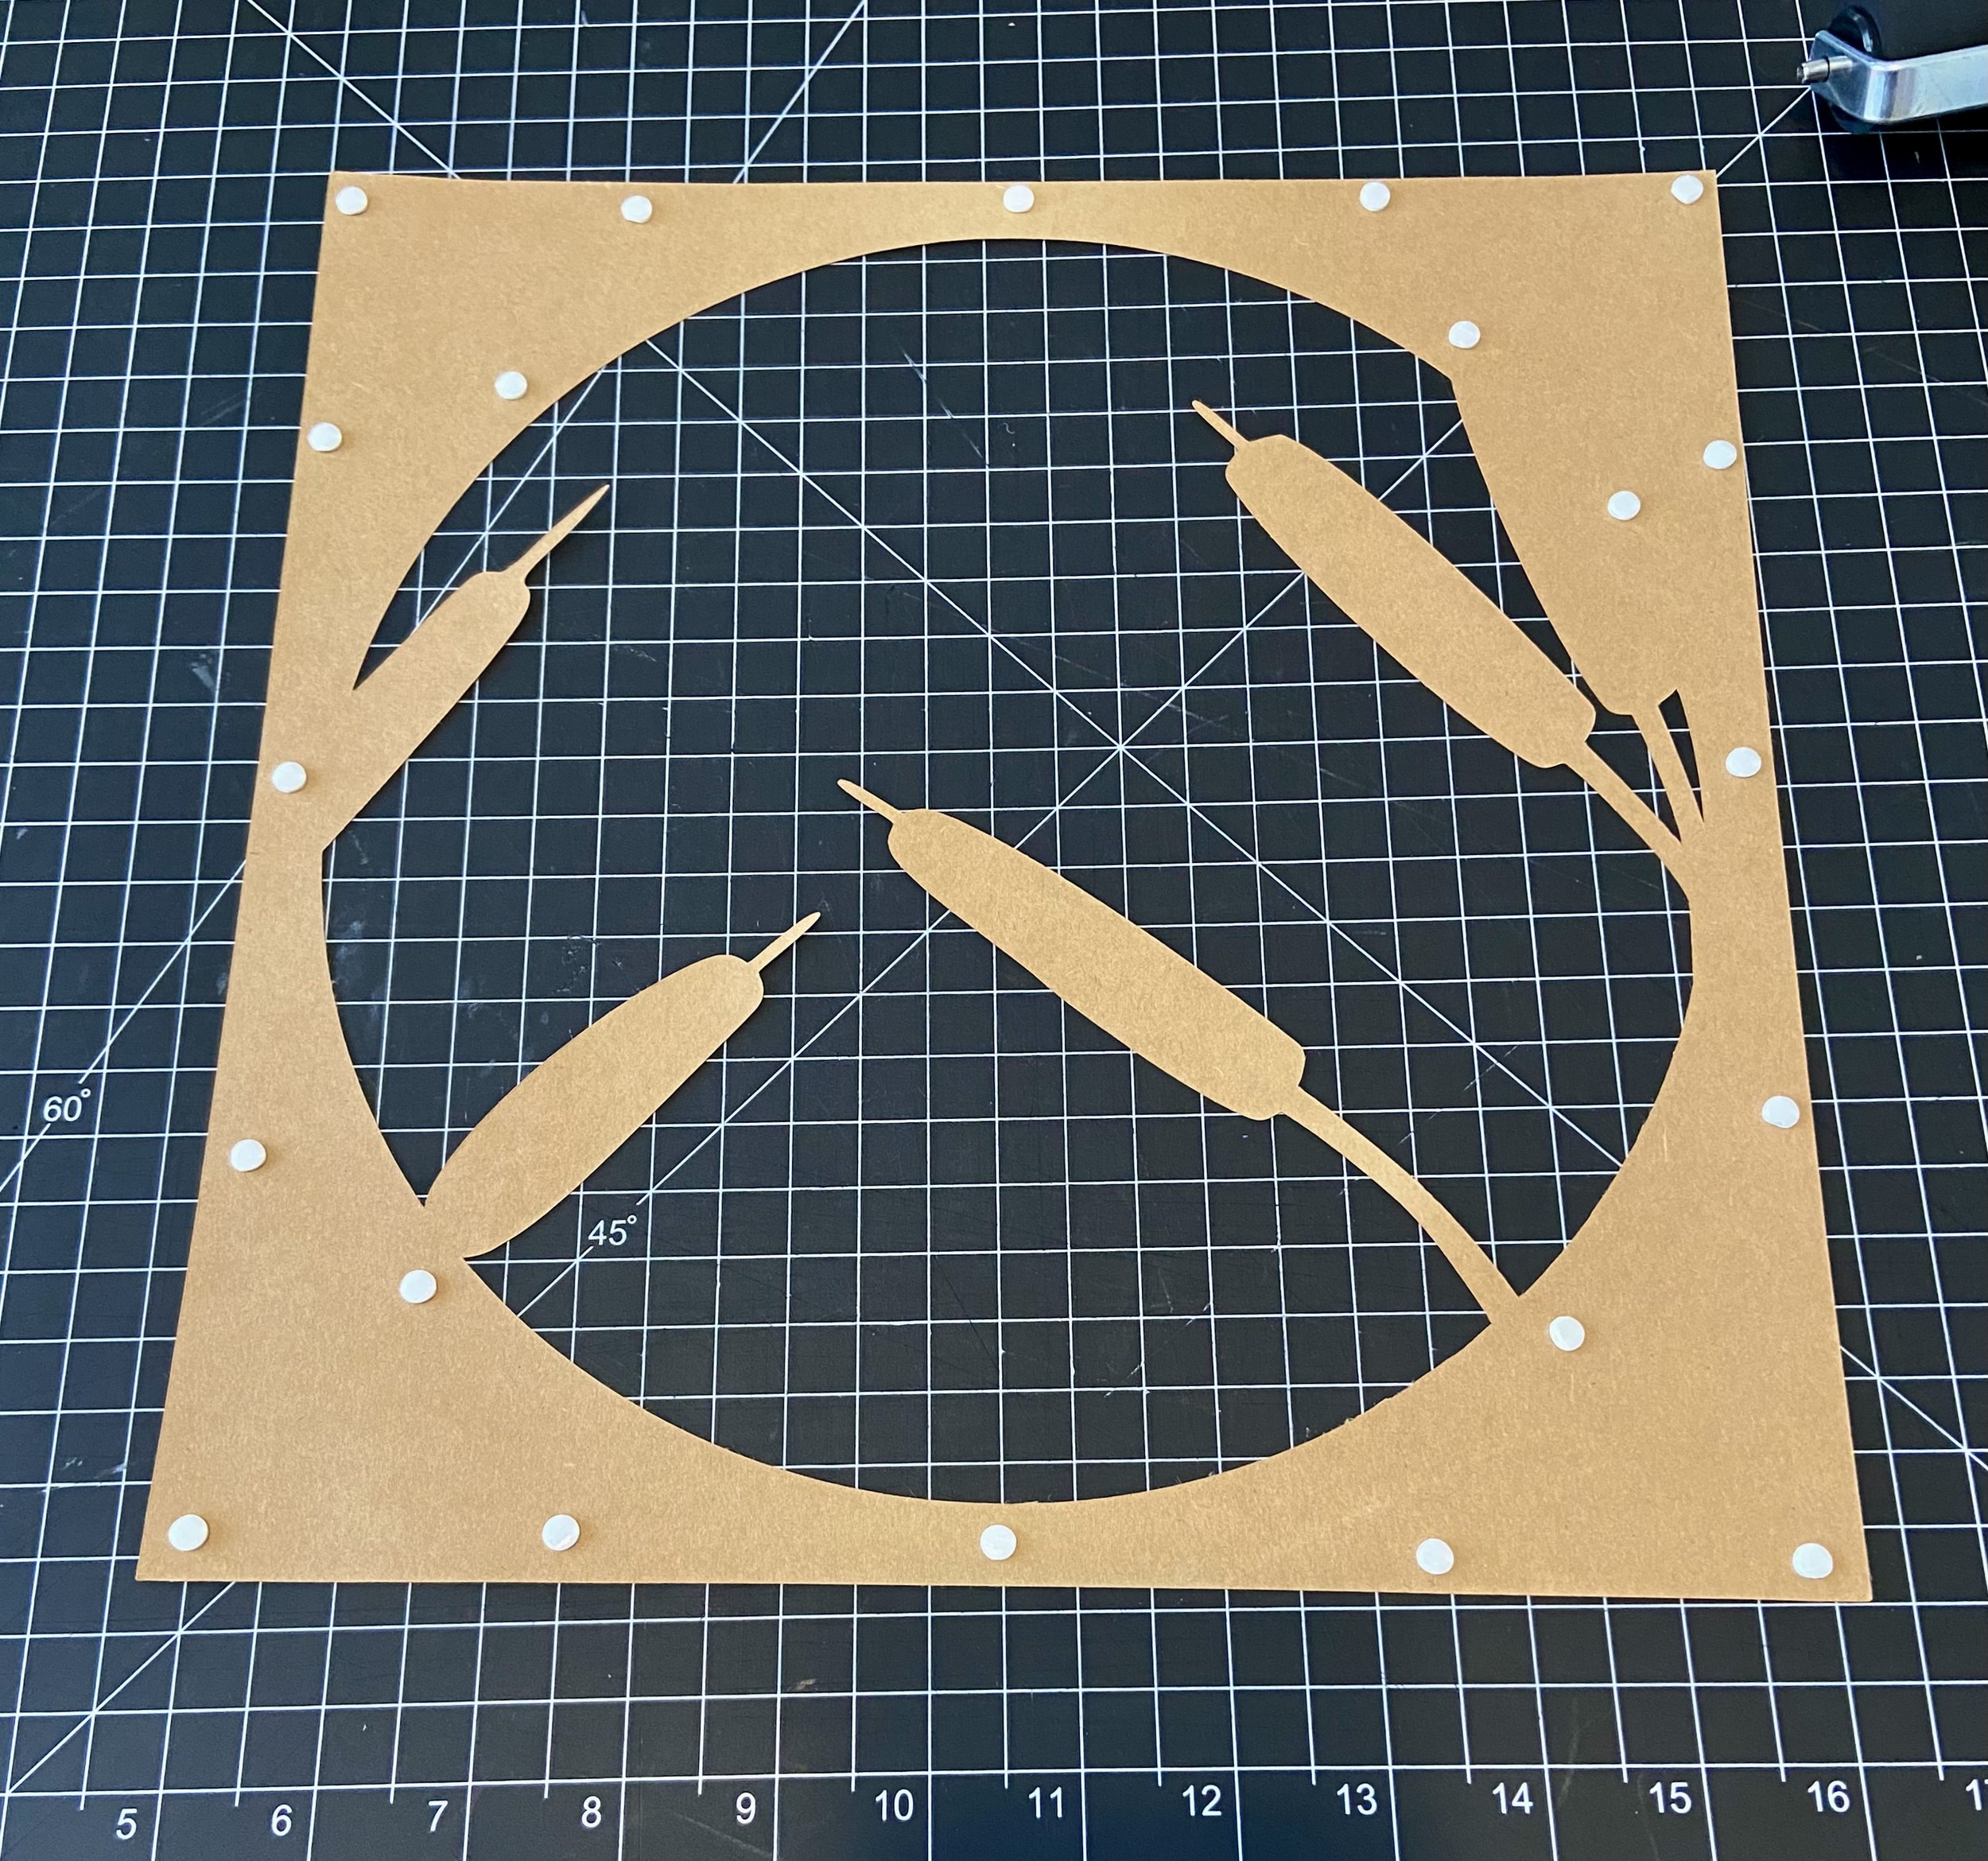
Repeat the steps for Layer #5. You will notice that this layer also has the tall grass design on it - allowing you to adhere the grasses from Layer #6 to it. Sometimes you may need to cut down the foam dots with scissors or a craft knife, so they are not visible. Continue with Layer #6.
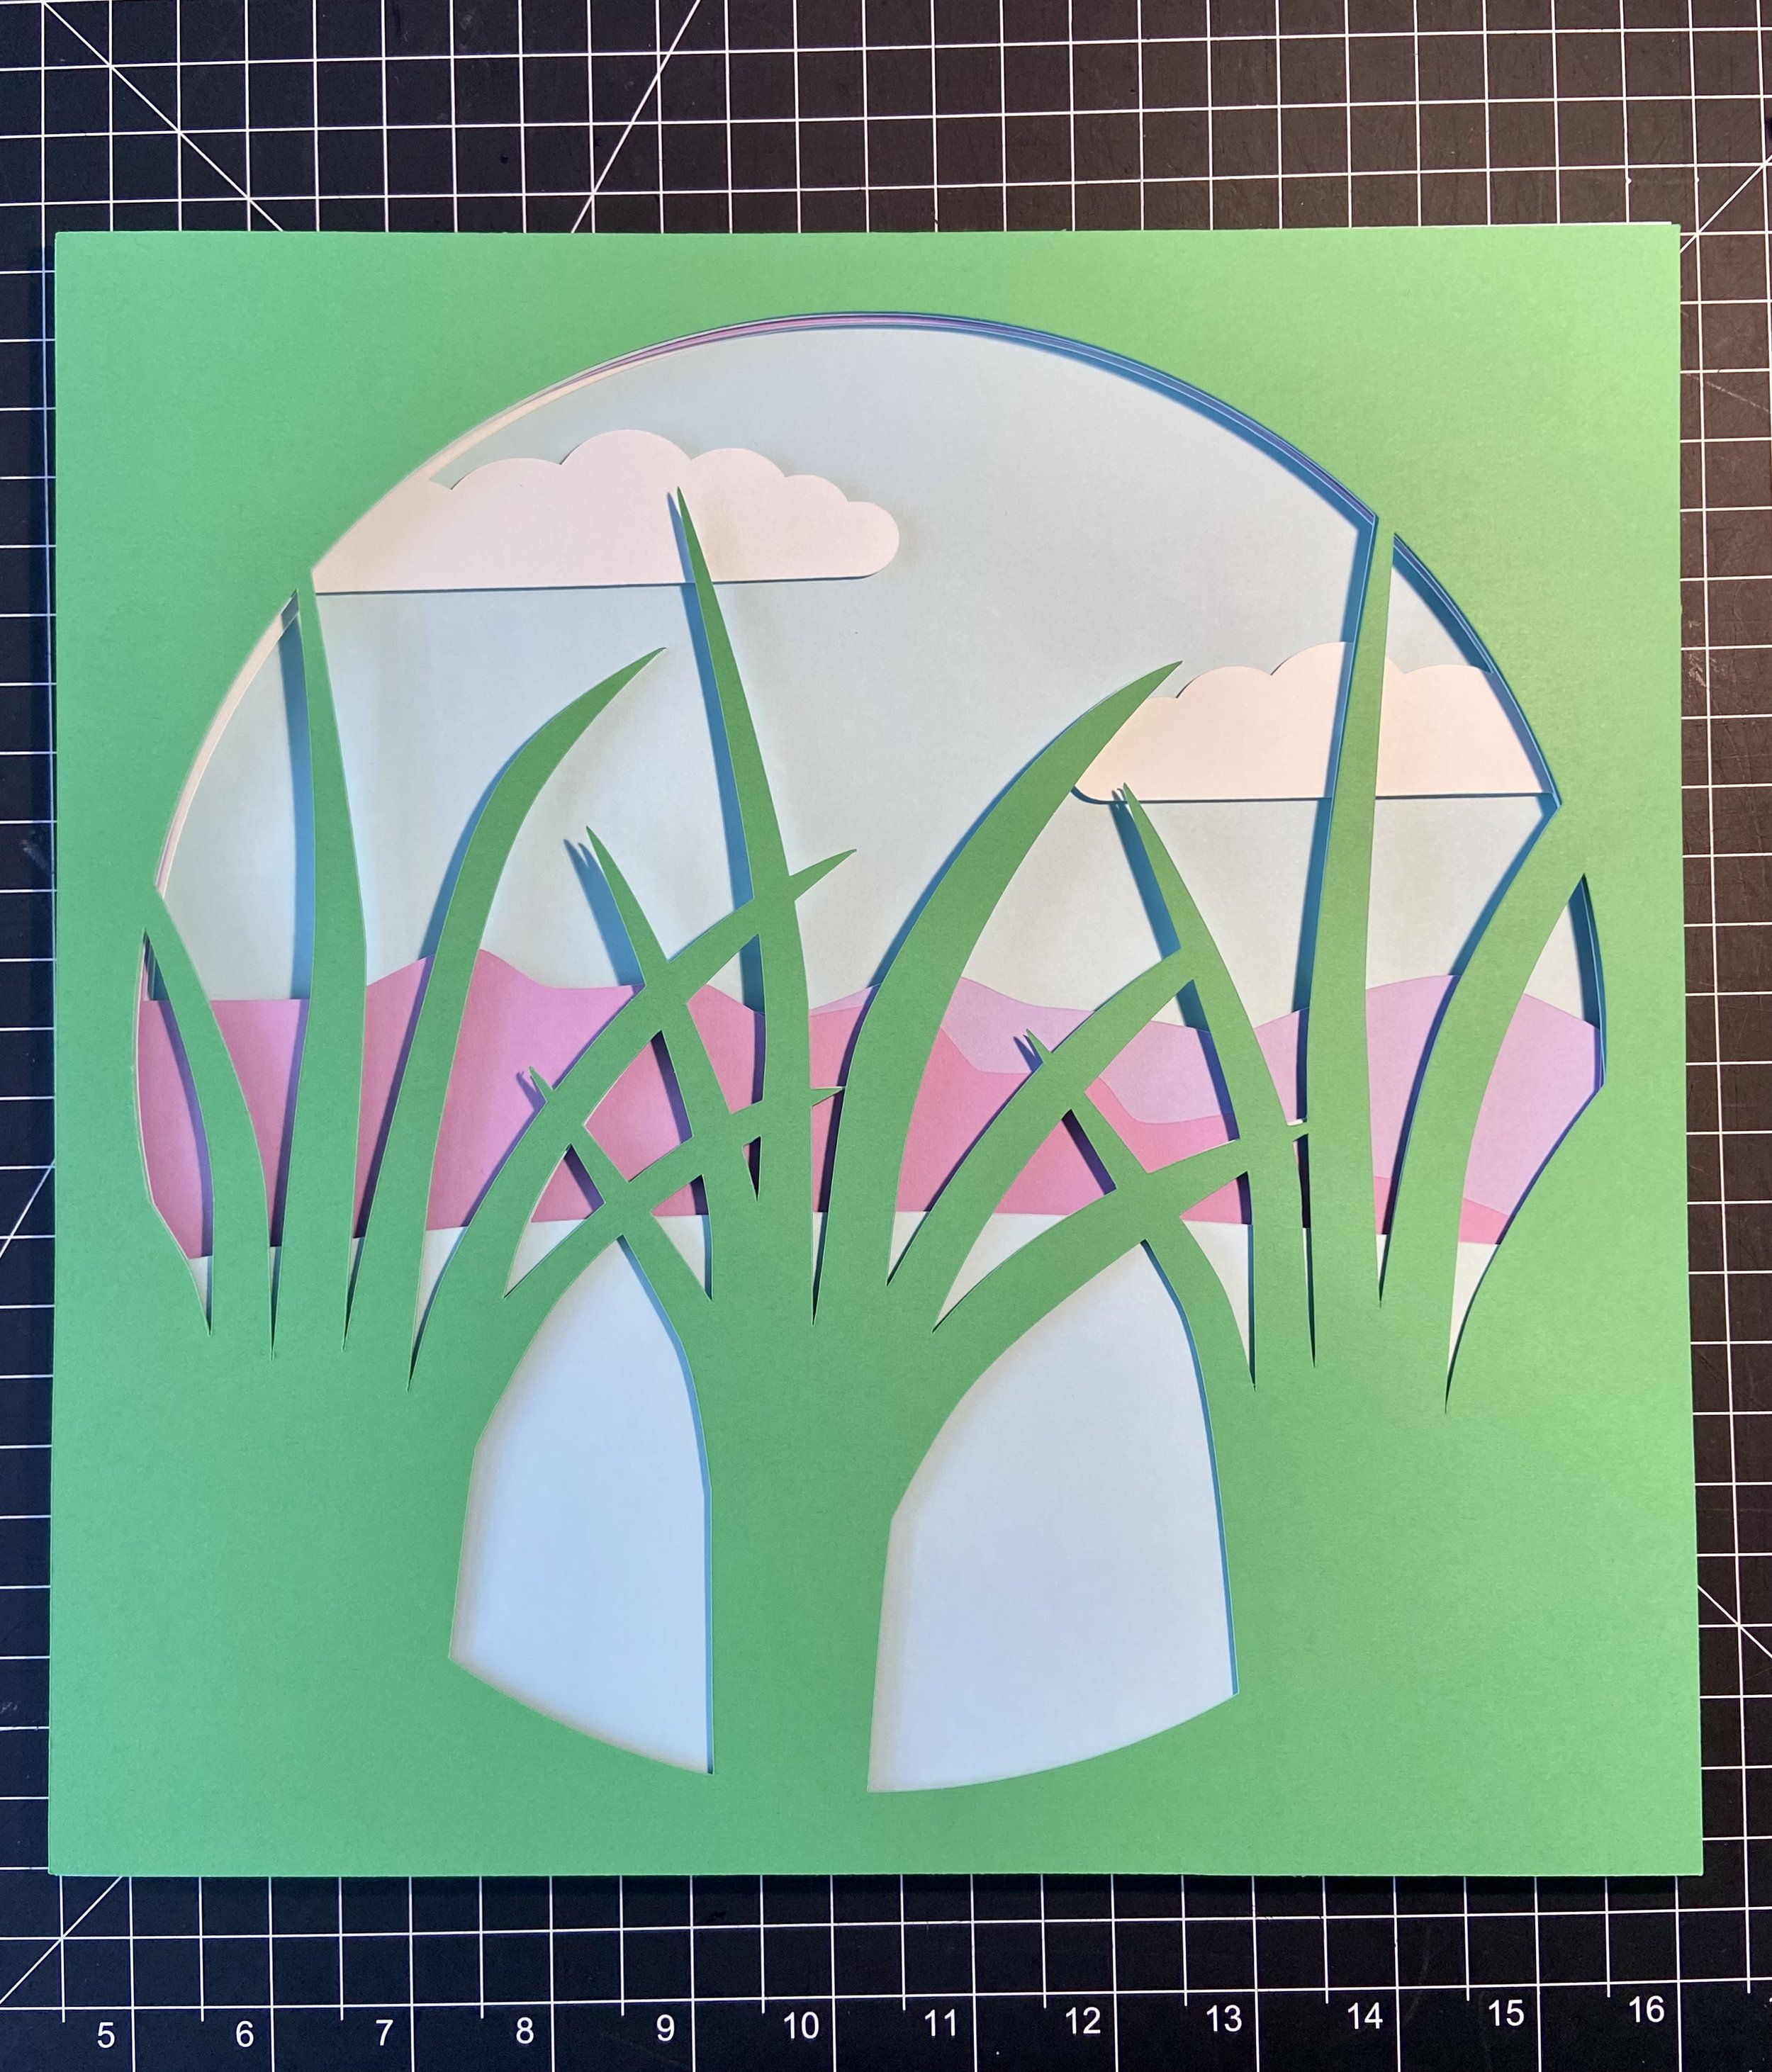
The birds will be attached to Layer #7. I found it easier to adhere the circle design of this layer first and then place additional foam dots on the cattails based on the grasses. The placement of these foam dots needs to be more accurate. Add foam dots at the top of the cattail where it meets the grass and along the way to the base. This helps hold up the birds. Use the glue pen to glue the bird feet to the cattails and use foam dots to connect the birds to the grasses.
Use foam dots for Layers #8 through #10. Finish the layers with Layer #11. This circle is slightly smaller than the rest of the design, so line up the edges when adhering.
Place the layers inside the frame and your shadow box is complete! Allow plenty of time on this project for cutting all the layers and assembly, but the final product is totally worth it.


